How you bind your book is going to have a consequence
Saddle Stick Binding - We are going to saddle stitch the book which means that it needs to be a multiple of 4 pages for it to work.
Perfect Binding - Ring Binding is an example - single sheets glued down the edges. the pages in a perfect stitch can go in multiples of 2.
Readers Spreads - This is how in the pages palette you can see the pages. This is how the final book is going to look when trimmed and put together.
Printers Spreads- This is how the pages are going to be arranged next to each other when re-ordered in Indesign's print settings to see the booklet.
An easy way to work out the printers spreads is by creating a to column grid by hand. One column is the right hand page and the other is the left. You can work down the columns in a zig zag fashion and keep going until you get to half of the number of pages. Then make your way back up from the bottom to the top and you should end up with the last page facing the first page. All of the printers spreads should always ad up to one more than the total number of pages.
Example 1 and 8 = 9 in this case below
Auto Page Numbering
Double click on the 'A-master' slide in the pages palette. Then in here make a simple text box and place the number 1 in there.
Then, go to Insert Special Character, Markers and Current Page Number.
As you can see it has added pages down all the left hand sided pages. To transfer to the right I can copy the 'A' on the master slide and drag it over the right hand page to give me my final numbered document.
If you only want the numbering on some pages and not other such as the front cover. You can do this when you create your Indesign document by changing 'start page numbering' to a different number than'1'.
To make the numbering start later. For example, if you needed page number 2 to start on page number three, you can click on which page you want to start on and go into 'Numbering & Section Options' in the pages palette menu. From here, I can select the start page numbering later. To so this will have to remove the master from the first two pages if I wanted to start on the third page.
We go to Print Booklet and select '2-up Saddle Stitch'
When you click though to print you get the settings. Here you need to make sure that print blank pages is selected!
If your not working with bleed then you can get away with printing it on an A3 but with bleed and trim marks you will need to print onto A2.
With double sided printing, always set the page position to be centred which will make sure that what is printed on one side will line up to what is printed on the other side.
To print double sided, you need to go into the 'Printer' options then into layout options. The two sided option is at the bottom and you should always select Short-Edge binding when your book is going to be bound by the shortest edge and this will automatically be set for you.
Because were working with A4 onto A3 paper then we are using the shorted edge where binding. If you choose the wrong option it will print upside down on the back of the paper.
Postscript
PostScript is the language that your digital file is turned into and used when you send something through to a printer. The printer then recompiles the information to print the document.
A few years ago the most common type of font was Postscript Fonts and Truetype fonts which has now been replaced by Open Style Fonts.
A postscript file is very much like a PDF file. In order for Indesign to create this file when Iv'e selected it in the print options.

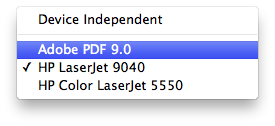
We are going to be using the Adobe PDF which allows us to create a postscript file all the way up to A0 in size.
I can now see my document ready to print on A2 with crop marks which I have selected. I can now go over to save which will give me a postscript file which i can now open in preview when i double click it.
Converting The Postscript File into PDF with Adobe Distiller
We can open Acrobat Distiller which is simple to use. We choose the setting that we need, in this case press quality and then we canjust drag our postscript file into this area on the program. This
ISSUU
Always save the PDF in the smallest file size.
Heres an example of my Issuu account. I can then go onto embed these e-books into websites or my blog to help make my work visual online.


Leave your comment