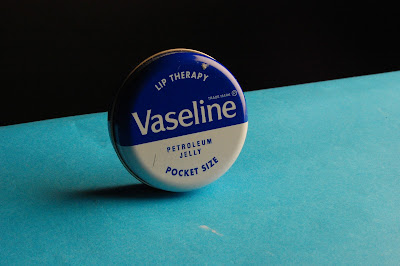
We looked at the three main priorities which are 'Shutter' (S), 'Aperture' (A) and 'Manual' (M). We also looked at changing the ISO to alter the look of an image depending on what light you are working with. Finally we touched on white balance which alters the colour balance of your image.
Shutter Speed is how long (in seconds) the shutter of the camera is open for. This means if is open for longer, it is letting in more light. This can be seen in some of my images where i was playing around using a tripod and taking photographs of people moving around to make it look like a ghost like figure.
Aperture is how much the shutter is open. The smaller the aperture number the bigger the shutter is open and vice versa. The bigger the aperture the hole, obviously the more light is let in through the shutter.
White balance is the light our working with . If it is studio lighting your better using 'Tungston'. This is because studio lights give off an orange glow so if your camera is on this setting then it adds more blue to the image to compensate for the studio lights and gives you a good looking final image. Other settings are for daylight, candle light, overcast clouds. ISO also needs to be altered depending on your lighting. The higher the ISO, the darker the lighting and vice versa
Here are some experiments i took in the workshop, playing around with all the different settings...
Tungston - Adds Blue in normal lighting
Auto ISO
Aperture F:22 Shutter 1/40. Manuel Focus.
Really like the arms tones and the shadows cast form studio lighting here. These settings i took a note of for future reference.
Longer Sutter Speeds - 1/5 means more light has been let in resulting in this.
Shutter 1/50. Works better
Playing with placement of light and angle of shot.
Also looking at depth of field.
Introducing a yellow background to see how the red reacts to this.
Aperture F:22 Shutter 1/60 - Much too Dark
Again too dark
Shutter 1/13 - brightens the image up - Works much better (maybe too bright)
Shutter around the middle, still too dark.
RED ON RED (BELOW)
1/320 Aperture - Background looks black
1/40 Aperture - Edges blend in with red background.
1/60 Aperture
Like this effect - red coming in from left and shadow on the right
TOO BRIGHT
PERFECT
TOO DARK
Other Experiments (Below)
Studio Lighting behind object
Shutter Speed - Light Trails and movement
3 Second Exposure
NO TRIPOD - 10 Second Exposure - MESSSSSSSY
10 second Exposure (using Tripod)
15 Second Exposure
10 Second Exposure
10 Second Exposure
30 Second Exposure
30 Second Exposure
Shutter Speed and Zoom


Leave your comment